A key aspect of every wedding photographer’s role is to curate beautiful shots that showcase the romantic details of a couple’s wedding. It’s more than just snapping great photos of the couple and their loved ones; it’s about telling a story.
To capture a great detail shot, you will need to know how to style a wedding flat lay.
What is a Flat Lay?
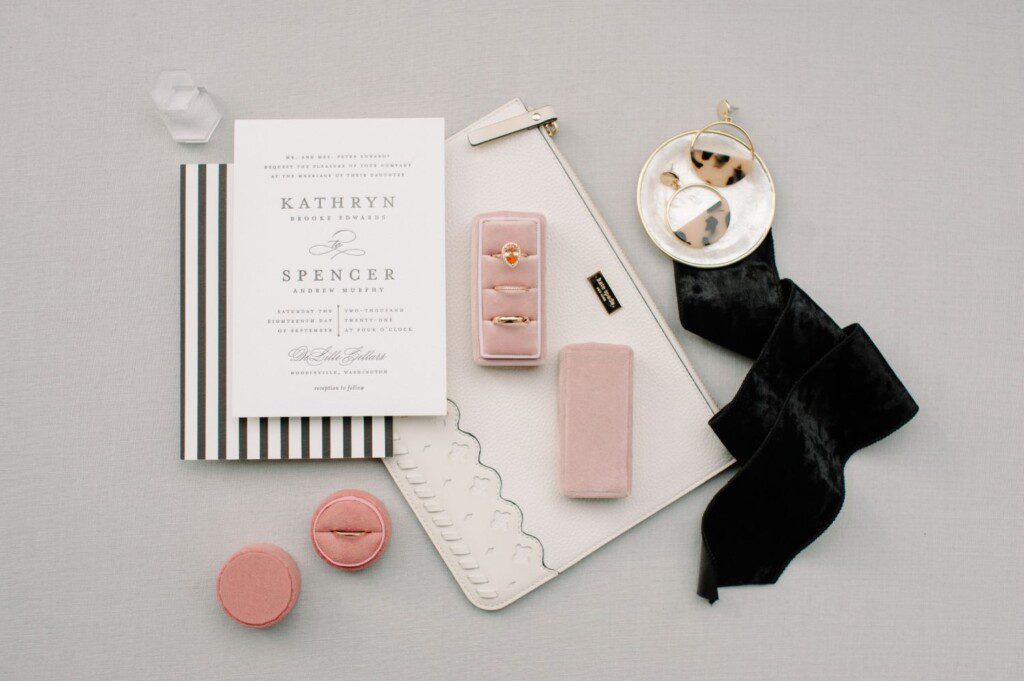
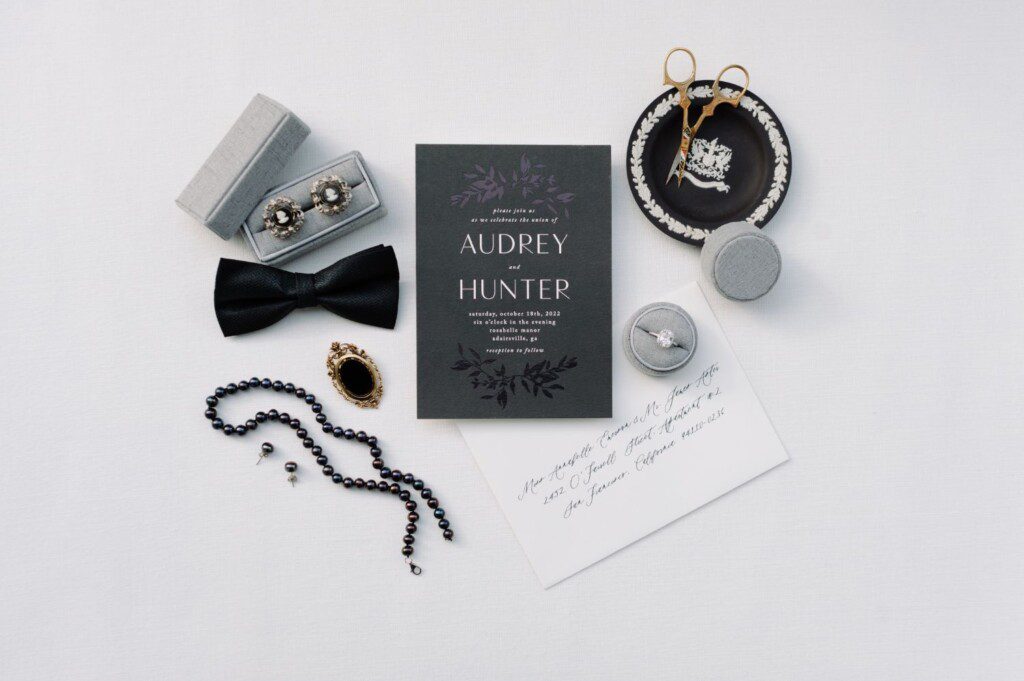
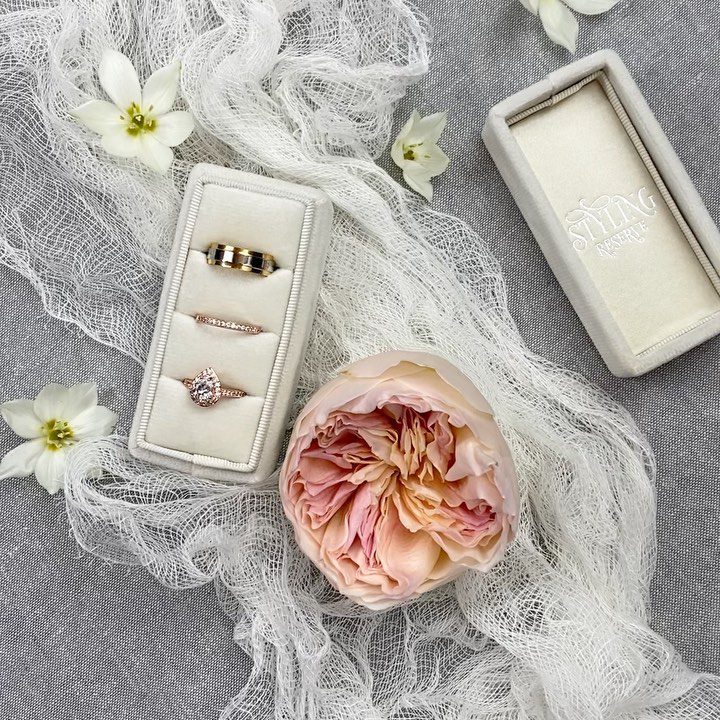
Simply put, a flat lay is a photograph taken from directly above, which features a collection of objects arranged on a flat surface. Some people call these kinds of images a bird’s-eye-view shot. It’s more than product photography; the idea is to use the objects to tell a story, especially with wedding photography.
Elements of a Flat Lay
As the photographer, your creativity is the only limit with what you can include in the flat lay. The objects you use can be anything, as long as they work together to tell a story and follow some basic styling guidelines (listed below).
You can use a wide variety of objects, from bits of lace or ribbon and flowers or little wooden spools, to small items from the couple’s relationship together–a piece of the bride-to-be’s dress from their first date, shells they collected on the beach together, a pebble from their favorite camping spot…
Tips for Styling the Perfect Wedding Flat Lays
Ready to get started? Here are the steps to follow to style your beautiful wedding flat lays:
Step One: Choose Your Backdrop
The background of a flat lay is important for setting the scene. For weddings, I like to use simple fabric in neutral colors that compliment the colors used in the wedding itself. Simple is good, because you can add more dimension and texture with different materials.
Pro Tip: Use the same styling backdrop(s) for all flatlays for a wedding to keep cohesion and consistency in the ‘story’.
Step Two: Determine Your Composition
Next, you’ll want to choose the boundaries of your shot by selecting your composition. Will you be shooting vertically, horizontally, or square? Don’t worry, you can change it later, but it’s important to have a starting composition so that you can frame your objects to fit. From there, you need to decide how the items will be arranged. You can keep a grid in mind to help you space items evenly, or, you can create more of a hierarchy and arrange them in a triangle.
Pro Tip: When composing your flat lay, always be sure to follow the rule of thirds.
Step Three: Gather Your Objects
Before you begin arranging your objects within the composition, I like to gather everything I might use so that I can see all of the items together. You’ll want to use elements that tell the story of the scene you’re creating, and it’s a great idea to include natural elements like flowers, pebbles, shells, and pieces of wood. Always be sure that the props have complimentary colors so that they work well together.
Pro Tip: If you’re designing multiple flat lays for the same wedding, be sure to use some of the objects in every flat lay to maintain consistency and keep the story moving forward.
Step Four: Create a Focal Point
Begin adding your objects from large to small. You can definitely layer some objects, such as placing a bit of fabric underneath an antique tray, to create more dimension and texture. As you place items, it’s key to keep your focal point for that image in mind. You don’t want to overpower it by creating too much busyness in other sections of the photo.
Pro Tip: Remember that the eye will gravitate toward the center left corner, so your focal point should be in or near that space.
Step Five: Add Dimension and Spacing
To keep your flat lay balanced, you will want to make sure that your eye has a path to follow across the flat lay. Make sure there’s equal space between all of the items (or groups of items). I usually just eyeball it, but you can definitely measure between the objects if you want to make it perfect (no judgment, here!). This is part of why you want to add larger items first, and fill in the smaller open spaces with things like vintage stamps, flower petals, or accent jewelry.
Pro Tip: Use styling blocks to elevate props in your flat lay and to add texture and dimension.
Final Step: Play With It!
Keep moving props around until you’re happy with how the overall flat lay looks. It’s totally okay for some items to be partially cropped out–it makes the scene look more natural! Once you feel like you’re happy with the look, take a few test shots. This will help you to find any gaps or identify areas that you might want to tweak.
Pro Tip: Less is more – you don’t have to use every single prop you have on hand. In fact, it’s better to mix in some objects for some of your flat lays, and swap them out for others in later looks. This keeps the story moving forward.
Hopefully, these tips will help you to style a beautiful wedding flat lay that captures the details and tells your couple’s story on the next level!